This will be my first tutorial, so please be patient and holler at me if something is not clear!
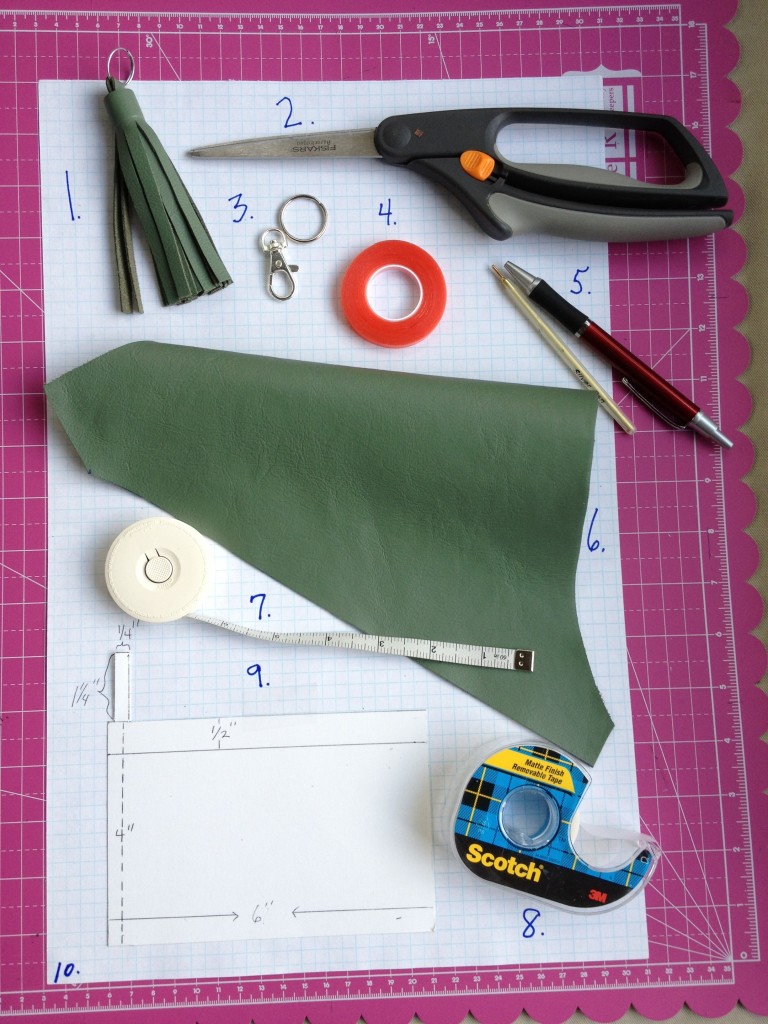
This is a picture and list of what you will use:
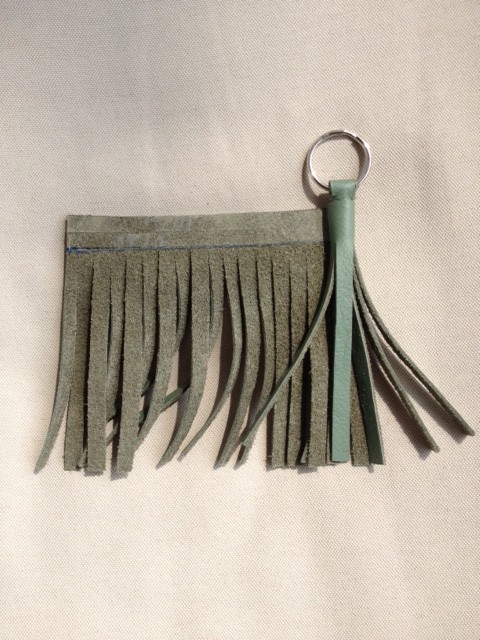
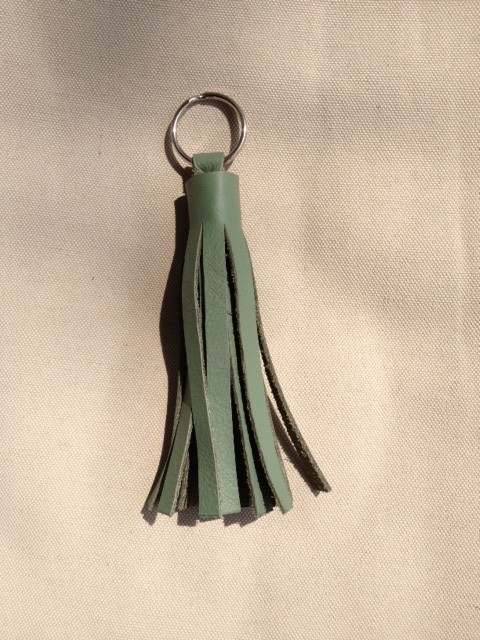
- The tassel we are making. This one is set up to be a key ring. I will show pictures and information at the end to make modifications. This tassel is 4.5 inches from top of leather loop to the bottom of the fringe.
- Scissors capable of cutting your leather.
- Key ring (swivel for variation)
- Double sided tape.
- Pen
- Leather: I used a remnant of upholstery leather.
- Tape measure or ruler
- Tape
- Pattern
- 1/4 ” grid paper (or make your own with ruler)
My leather came from the remnant bin at Tandy Leather. Craft stores generally carry small pieces of leather or you can recycle some from your closet. Hobby stores and fabric stores will carry the double sided tape (I used 1/4″, though any up to 1/2″ will work). Those same stores will carry the key rings and swivel hooks in several finishes. If you are still reading, let’s get started!
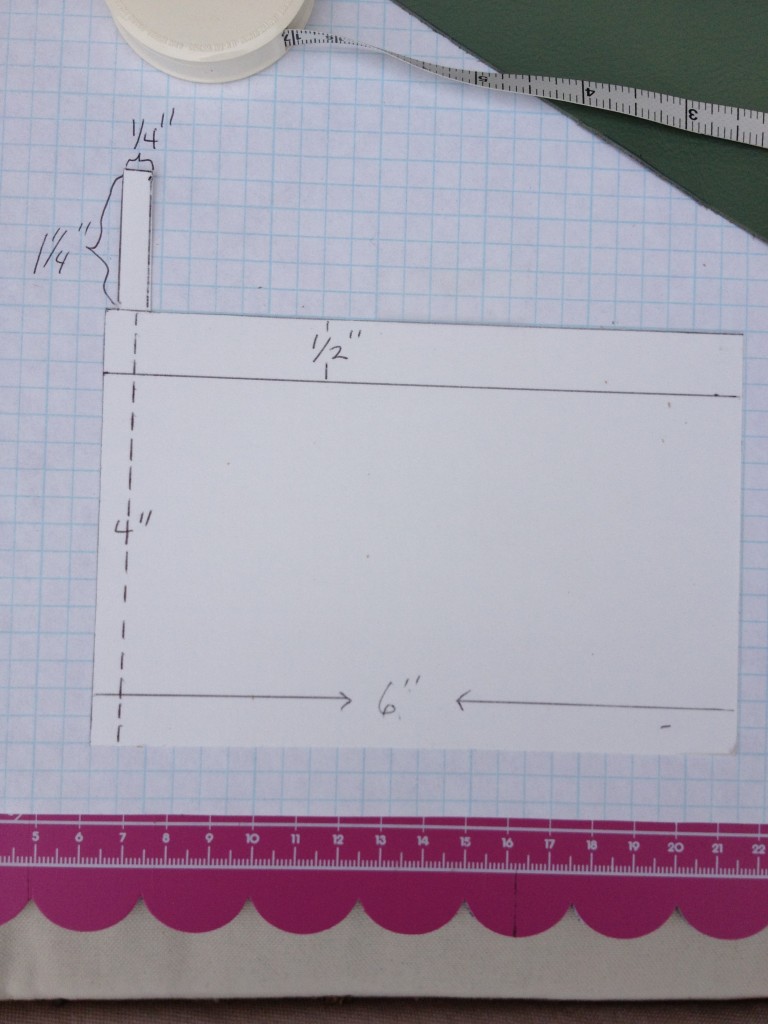
Make a paper pattern using the measurements below. You can vary the measurements to suit your taste.
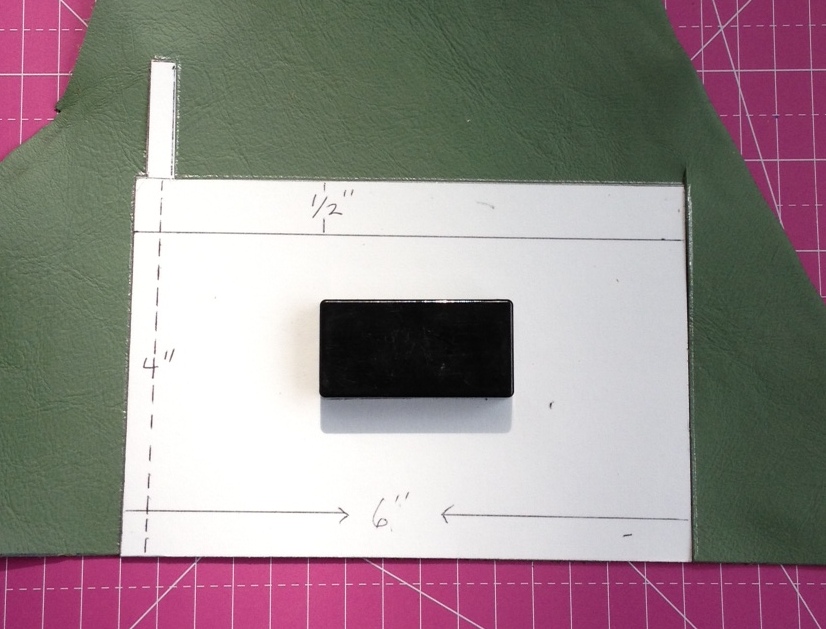
Lay your pattern on your leather. Either cut it our or trace around it with a pen and then cut it out. I am using a magnetic cutting board and large magnet to hold the pattern down. Just don’t pin your pattern down as it will leave holes in the leather.
Take the leather you cut and mark the 1/2″ line unto the BACK side of the leather with an ink pen or thin sharpie.
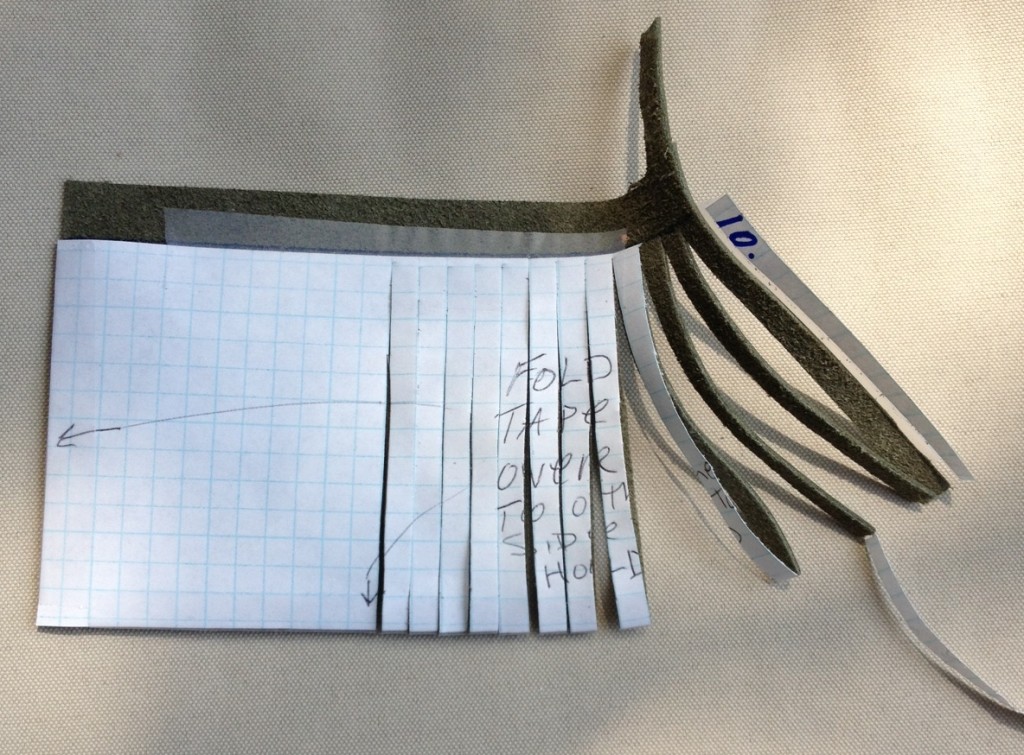
Next you will tape the grid paper onto the back of the leather. Carry the tape around to the front.
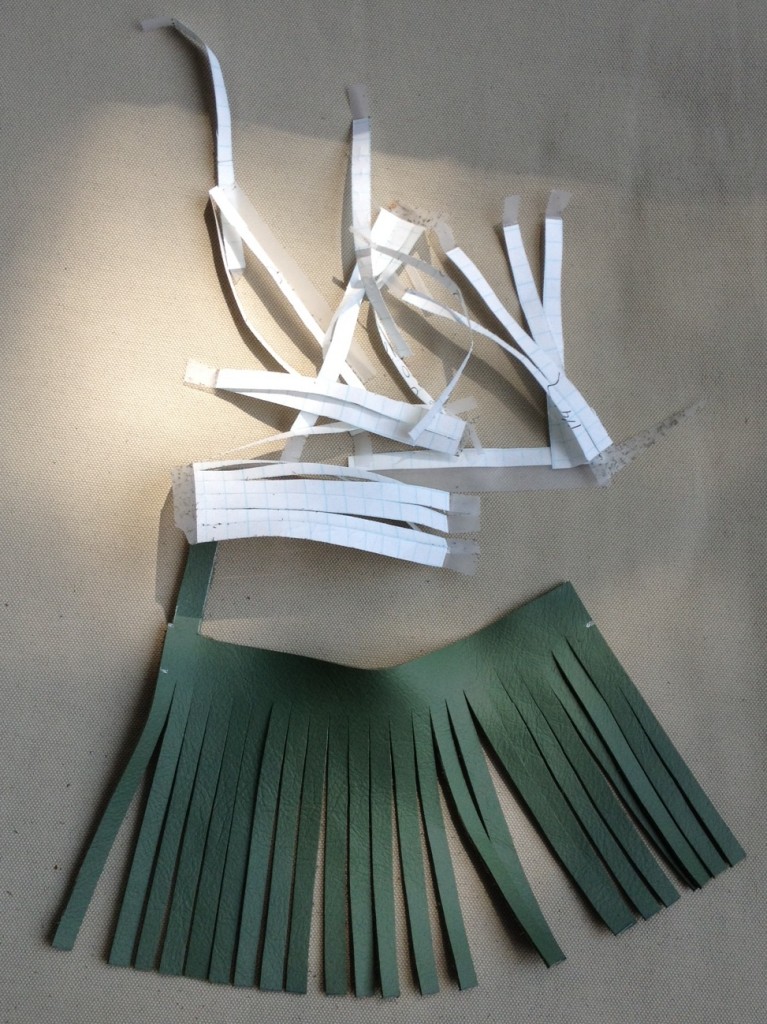
Okay, time to grab your scissors again. NO, no, do not think about tearing up this post! Starting on the right side, cut the grid line from the bottom to the inked line at the end of the graph paper.
Continue cutting each grid line until you have them all done. Should look like this:
Okay, let’s put this puppy together! Grab your double sided tape, key ring and fringe.
Remember, we are working on the BACK side of the leather.
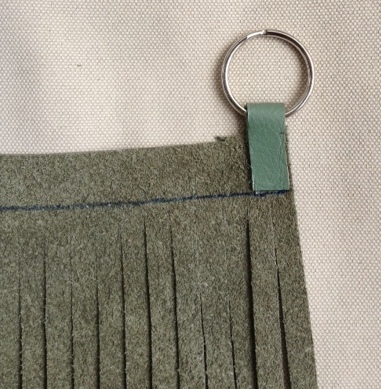
Put double sided tape about 3/4 of the length of the tab. Grab the ring, slide it on the tab and fold over to secure. See below for picture.
Now, let’s put the double sided tape across the top boxed edge. Again, see the picture below for detail.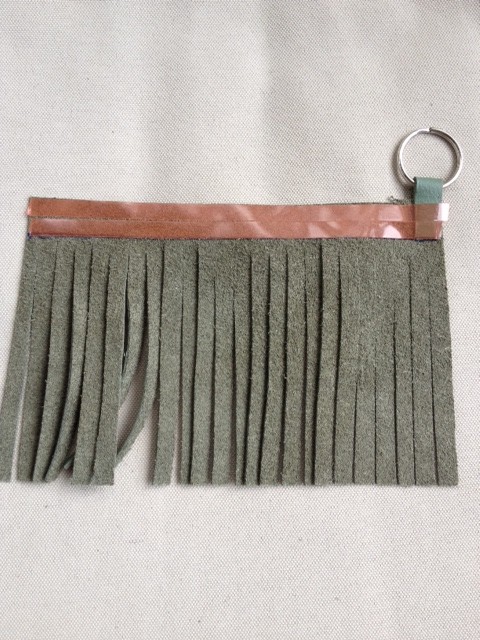
Okay, this is the home stretch. Start rolling on the tab end of the leather.
Keep rolling until there isn’t any rolling left to be had! Voila, you are done.
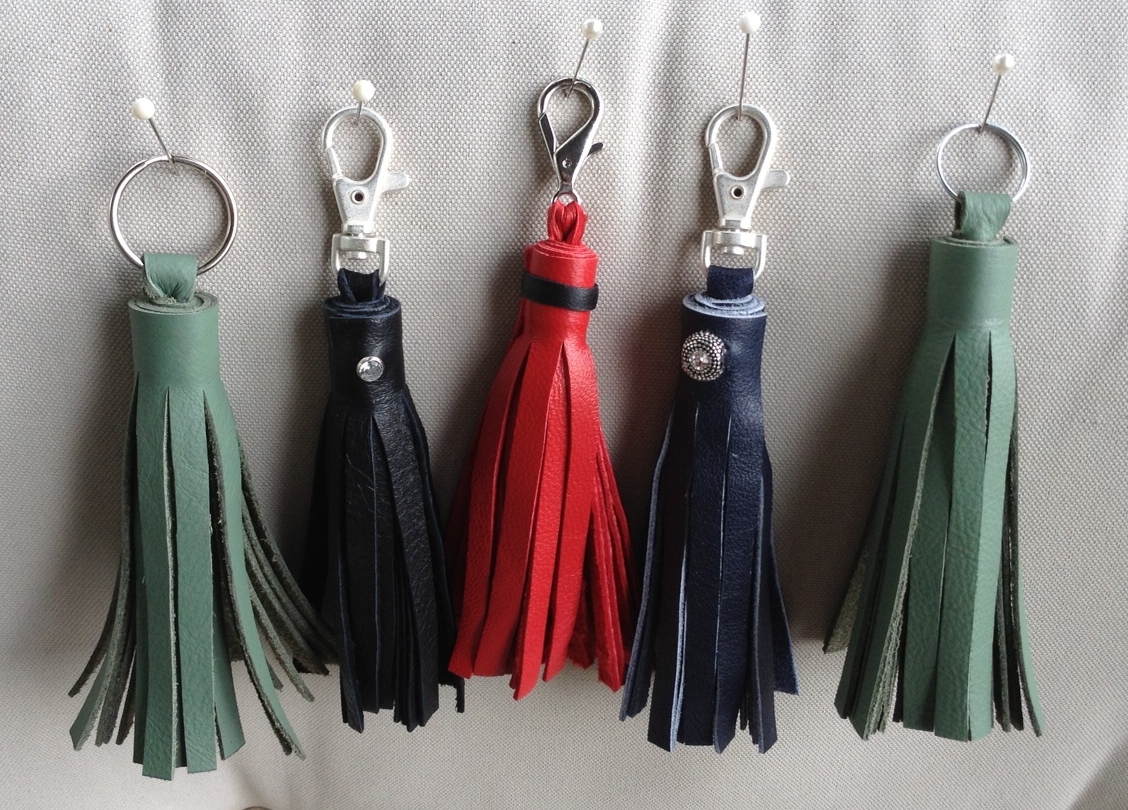
Here is a picture of some others that I made yesterday. I embellished them with rivets, beads and leather. I varied the rings and hooks that I used, mainly because I was grabbing from my stash!
Well, my first (but hopefully not my last) tutorial is done. Enjoy making the tassels and if you would rather buy them, check out my store button at the top.
10 Comments

This looks really easy; I can’t wait to try my hand at making one! I like that it’s no-sew project. Just need to get my hands on some leather…
I can bring a couple of pieces of leather when I come to DC.
Glad you liked it.
Hello Cathy!
Found you on the blog class Facebook page.
I just had to share with you how excited I was to see/read this post! I work for a handbag retailer and tassels are THE THING right now for us. Never in a million years did I think I could make my own! Your instructions were easy and inspiring! Thanks for sharing!
Best blogging wishes,
Anna
So glad you enjoyed. They were so easy to make. Thank you for the encouragement!
cathy
Still trying to figure this blog stuff out!
Really easy to follow tutorial! I think I will make a few of these for “pulls” on my luggage zippers.
Glad you found it easy to follow. One is never quite sure!
I need to put one on my luggage as well.
Thanks for commenting.
cathy
I have been searching for the easiest way to make nice looking tassels for my bags. Thanks for the instructions.
Excellent tutorial! How do you put the studs/rivets in at the top? They are so cute!
I used a rivet setter to put them into the front of the leather before I wrapped it! Rivet setting is easy. I just use Tandy rivets and their inexpensive setter.
Does the double stick tape hold? Does the whole thing not unravel over time?